Tuesday, November 29, 2011

Traditional Concert Ukulele update

So I've been trying to catch up on this one so I can do the finish on both ukes at the same time.  I've been slacking on taking pics with this one, but its almost identical to Michelle's, just getting nylon strings, and has slightly different neck dimensions.  I stained and attached the neck earlier.  Just took it out of the clamps about 20 minutes ago.


I have some touchups to do on the black areas.  I'm not quite happy with the blend on it yet, and the headstock will need some as well.  I'll get that done tomorrow and probably put the bridge on and start cutting the inlay for it.

Steel String Concert Ukulele (overdue) update

So last week I got around to the neck.  I finished up the fretwork, inlaid the headstock, and glued on the bridge.  I'll be finishing it this week, I've just been trying to catch up on the other one so I can put on the finish at the same time.  Here's a couple current pics:


Thanks go out to Lou Shields.  I ran out of black dye, so he gave me the leftovers from his Shitar case so I could mix black epoxy for the inlay.

Sunday, November 13, 2011

Concert Ukulele, nearing the end

So a few nights ago I cut out the inlay for the headstock after doing all the neck shaping and slotting the headstock.  I still need to dye the faceplate on the headstock before I route it out and glue in the logo.


I still need to clean that up a little bit to remove some sloppy edges. 

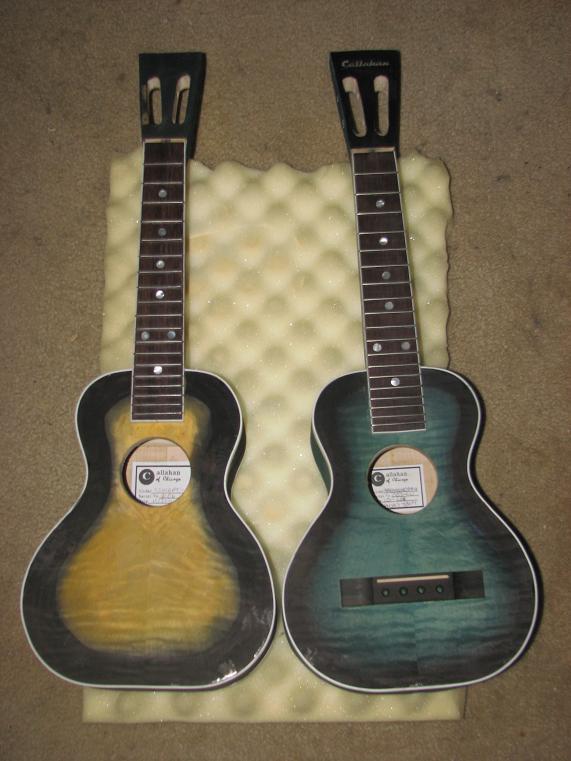
Last night, I did the cleanup work on the neck to remove a few tool marks.  That took way less time than expected, soI dyed the back of the neck with the Dark Green to match the sides, Managed to get the color right and only really needed 2 coats.  I let that dry overnight.


I was supposed to go skate this morning, but a combination of heavy winds, and a very sore back put me out of commission.  I ended up sleeping all day, but when I woke up, I got right back to work and glued in the neck.


I let that set for about 90 minutes, and just took it out of the clamps.  It feels pretty solid, so I'm gonna let it set another hour or two before I finish up the fretwork.  As you'll see in the next pic, the fretboard looks pretty messy, I still have to level and crown the frets, as well as finish sand and buff up the fretboard. 


Not quite sure why that posted vertically.  Weird.  Oh well, thats all for now.


Wednesday, November 9, 2011

Concert Ukulele, Neck shaping *UPDATE*

So last night I got the fretting/binding done and glued the fretboard down onto the neck.  Slept forever today and woke up at 3:30pm, guess my cat decided to let me sleep for once.  Took my allergy meds and got to work immediately downsizing the overhang so the neck and fretboard were as flush as i could get em.  I had planned on using my orbital sander like I did on Tom's, but the sandpaper I bought isn't as high quality as 3m, so I ended up block planing the crap out of it.  Once it was smooth enough for my liking, I went at it with my rasps and files.  Last weekend I had watched an episode of The Woodwright's Shop with Roy Underhill and they were taling about how handcut rasps seem to cut more thoroughly than machine cut, so I tried out my shitty 3 dollar Harbor Freight rasp set over the more expensive Home Depot set.  Needless to say, I no longer think the cheap ones are so shitty.  Anyways, here's a bunch of pics, there's still some more filing and sanding to do, but its about 90% done.


And here's today's work so far.  As I said, still a little work needs to be done to clean up as many tool marks as possible.


I'm going to try to condense the next several blog posts, I have something special planned for my 100th entry.

*UPDATE*

Just slotted the headstock and drilled for tuners.  Learned a new technique involving the drill press and chisels, so I can ditch the sloppy routing.


Now to sand out any rough spots.

Monday, November 7, 2011

Concert Ukulele fretboard

So I started slotting the fretboard this afternoon with the saw I used on Tom's uke.  About halfway up the board, I heard the mail truck come by and went out to see if any of my orders came in.  Fretwire was in one of the packages, and I guess I didn't check the size of what I ordered, and this stuff is super narrow.  Too narrow for the slots I had cut even.  So, I started over with a razor saw and a makeshift miter guage to make sure I cut em straight.  Finally finished up a few hours ago, and glued in the inlay dots while i was at it.  While those were drying, I went to work shaping the dovetail joint on the neck, and also cut out the female joint on the body.  I don't have pics of the neck at the moment, my batteries died after shooting pics of the body.  Here's a few others for now:


Since I got pushed back a few hours having to recut the fret slots, I'll do the binding tomorrow.  Its too late now to be using the belt sander to flush up the sides.

Overdue post

I've been kinda slacking on the blog lately, Had mainly just been sending pics of the steel string uke straight to the buyer to show her progress.  I've got the body dyed and bound now, here's where that one is at currently:


It looks kinda blue in this pic, but when I put the finish on, it will mellow out to a nice green shade since the shellac I have has a yellow tint to it.

I've also cut out the necks and laid out the headstock shape.  Right now i'm waiting for a new bit to arrive so I can inlay it, as well as a better sawblade for cutting the fret slots.


This will get sanded to clean up the rough cuts.  Since I'm going with steel strings, I've added a 1/8 x 1/2" steel bar for strength against the string tension to avoid it bowing.