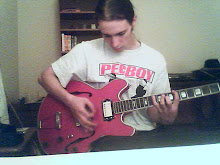
So far I've gotten quite a bit done in just 3 days of work. I'm not expecting to blow through this one, I'm taking as much time as I can in order not to screw it up, and making sure I have the instructor's assistance on everything I'm not sure about, especially when it comes to working with unfamiliar power tools. But anyways, so far I have my neck profile cut out, and the fretboard tapered. I have to clean it up still and put in my truss rod. After that I can glue down the fretboard and shape the neck and headstock. And eat the rest of my cheddar cheese pretzel Combos.
I forgot to add in earlier, my fretboard isn't really yellow. Its rosewood with a pretty nice looking grain pattern. The way the teacher advised us to do the taper is by coating the top with washable tempera paint and then drawing in the lines for the cuts, in order to not gouge up the wood in places we don't want gouges. It also makes the lines much easier to see when taking it to the bandsaw.
 So that was actually last week that I did the neck stuff, but I forgot to take pics until yesterday. I did get my basswood blank glued together last week as well, and yesterday got it cut out on the bandsaw and sanded down to shape. This is actually a pic of the back of it, I forgot to take a pic before chambering, so I just snapped one of the back and reversed it for referrence.
 Before I go any further, I'll explain the blue tape. there was a split in the basswood that just barely cut into my body shape. While sanding on the belt sander, a little chip broke off. After talking with Jim, the shop assistant, we decided that even though I'm binding the sides, it will help to have that extra bit of room to work with. So we glued it back in.
After the body was all sanded down, we did the routing. 3 passes, half inch or so at a time to create the sound cavities, making it a semi-hollowbody. I told Ian to remind me not to wear black next week. My clothing got covered in sawdust and wood shavings. It also made my allergies go nuts.

It can use a little cleaning up, and the top needs some sanding as well. Both the basswood and my Sequoia cap set a little funny, so I'm making some adjustments before gluing it together. I did get the cap cut out, but as I said, I'm sanding down the back of it to iron out any inconsistency and then I think we're gonna wet it to bend it down to glue on.

Thats just the rough shape. If you look closely, you'll see my pencil line on there that I'll eventually have to sand or rout down to. Thats all for this week unless i start on another shitar.
 For some reason it won't let me rotate it... But anyways... After I finished the sanding with my stew mac radius block, I cut new fret slots and cleaned them out with the back of an exacto knife.
 Following cleaning that up, I wiped the guitar off and tried to tap as much dust out of the sound hole as possible. I'm most likely going to vaccum it later when i'm done with everything. I concluded that acoustic guitars look stupid with natural wood colored necks unless done right, so I busted out the Dark Walnut stain leftover from my shitar and stained it up. Turned out looking somewhat interesting, I may go one coat darker, not sure yet. I'll have to wait until it dries.
  Thats all for now. I'm going to have to seal it and find what the hell I did with the frets. I saved them because I don't feel like spending the time to do a fine job on something that cost a dollar to begin with. I have plans to build a better acoustic later this year when I have the proper tools for cutting and sanding anyways.
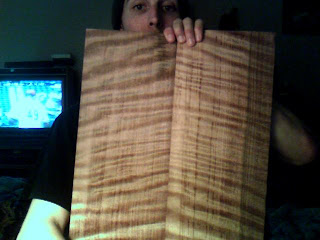


 I kinda forgot to take a full view of it strung up. I'll do that later