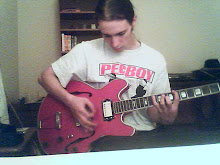
So about 2 weeks ago I went to the flea market in Lowell with Lou and Cappetto. Towards the end of the day Lou spotted this beat up old 50's Harmony sub-brand parlor guitar. It had cracks everywhere and was filthy, but only 5 bucks, so I told Lou if he bought it, I'd fix it for him.
So here's a pic of the body after i took off the rusty old strings and gave it a quick wipe with some pledge:

So the first thing I did was take off the tailpiece and tuners and take a wire brush to them to get off all the rust and grime. I tried to get a picture, but it just wasn't working out for me. They came out pretty well though.
There was one tuning post missing from the set. Luckily I have a box of mismatched half sets of tuners from other broken guitars I've bought in the past and found one that fit the set and put it on.
As far as cracks....There was a crack straight through the neck heel, and a split on the side that ran about 18 inches on the bass side.


I had read some stuff about harmonys on frets.com and decided to just pull the neck off and reset it. This was kinda a pain in the ass, but I'll need to learn it someday right?
So I laid down some potholders on the top and let an iron sit on the end of the fretboard for a little while to loosen up the glue, and pryed it up with a putty knife. I completely forgot to take pics of this part, kinda pissed now...
After that I used a modified wallpaper steamer to get into the neck joint and pop it out. Once I got it off, i pretty much glued the cracked piece of heel back on, then glued the neck back in right away. (note: this pic was taken before the glue was applied, I was making sure it fit back in place correctly before gluing it)

I let that sit overnight, and then went to work on that nasty side split.

I stuck some screwdrivers in there so I had enough room to apply glue. Poured some titebond into a dixie cup, and brushed as much as I could cleanly get into the crack with small watercolor paintbrushes. After that, I pretty much used every ratchet clamp I have. (note to self...buy more clamps...)

So once that dried, I used an expired guitar center gift card to scrape away all the thin residue that had squeezed out of the crack while clamped. I then sanded the whole edge that was repaired going 220, 320, 400, 600, 1000. Did the same with the repaired neck area. To finish up and cover the areas that had been sanded, I dipped a sponge in some dark walnut wood stain and smeared it across the scratch marks until it was mostly gone. Put a lite spray of poly over it, and then i was done.
Last step was reattaching the hardware. I used some double sided photo tape to stick the bridge on. Its not sticky enough to damage the top, but sticky enough to keep it in place. One bad part was that one of the tailpiece screws had stripped out while removing it, so I just used heavier screws in the two remaining holes that should get the job done.
So here it is finished:


All in all, I don't think I did too bad of a job. The neck did kinda get stained from the iron, but hey, it was a five dollar guitar and I fixed it for free, so I don't think Lou will be too upset. I'm just happy I documented as much as I could since I forgot to do this with my washburn, which I steam bent a piece of mahogany to replace a 4x6" section of the side.


 Now that i look at it, that was the before picture, and there was no after between here and the next step. So after flush routing, the cap got routed down to where the body bindings will sit as a referrence point for the top carving.
 After that, I got to carving. Ian had let me use his palm planes so it would go a little faster. Mine is only like 18mm I think, he's got one 2-3x that size. Aftermaking progress around the edge, I used rasps and sanding dowels to smooth it out before starting again. I'll just put up all the pics of the progress in action now.


 I'll just post those to keep this less graphic heavy. I'll post the neck pics in a different post in a minute.
 While the glue was setting on that, Ian helped me glue my Sequoia cap onto the chambered body. We used a bunch of scraps of wood left over from his Horn speakers so the clamps wouldn't dig into the figured wood.

 Since the ears weren't completely precise, I had to do a bit of sanding so when I safety plane the back to uniform thickness, the ears won't go flying off. After that I got the template worked out and transfered and we cut out the headstock shape. I had Ian do that since I'm still getting used to the bandsaw and needed to see how to do it on an angle like that. But here's the shape, a little oversized to accomodate for refinement and routing.
 For some reason it won't let me rotate it... But anyways... After I finished the sanding with my stew mac radius block, I cut new fret slots and cleaned them out with the back of an exacto knife.
 Following cleaning that up, I wiped the guitar off and tried to tap as much dust out of the sound hole as possible. I'm most likely going to vaccum it later when i'm done with everything. I concluded that acoustic guitars look stupid with natural wood colored necks unless done right, so I busted out the Dark Walnut stain leftover from my shitar and stained it up. Turned out looking somewhat interesting, I may go one coat darker, not sure yet. I'll have to wait until it dries.
  Thats all for now. I'm going to have to seal it and find what the hell I did with the frets. I saved them because I don't feel like spending the time to do a fine job on something that cost a dollar to begin with. I have plans to build a better acoustic later this year when I have the proper tools for cutting and sanding anyways.

 More later...
 So after that, I started cutting out the body. As you'll see, I went with sort of a trapezoidal shape as Nick calls it. I'm going to add the "M" holes later. I have to get a better router bit for that I think. I can get that cheaply at my favorite toy store. There's nothing really to tell about cutting down my plywood, just used a circular saw and made some 13x12" rectangles to start with. Marked off my middle and drew the lines and cut em out with the jigsaw. I pretty much did the same with the sides, and i'm gonna cut some more strips later for bracings. Here's a bunch of pics. Sorry for the lack of info here, this was just a really simple proccess and not much to ramble about.

 So after all that cutting, I cut out a small piece of wood to use as a bridge/saddle, and glued that in, as well as glued the top of the body to the neck. After that all dries, I'm going to add some bracings to the back, which I'll cut later and take more pics for you to see. Here's the rest of what I've got, I'll try to make my next post more detailed or entertaining or something. heh.